当サイトは、アフィリエイト広告を利用しています
【React × Emotion】疑似要素の使い方
作成日:2022月04月09日
更新日:2023年11月30日


emotionで疑似要素を使う
react + emotionで疑似要素を使う方法をメモ。
Emotionの基本的な使い方は下記記事で紹介しています


基本の書き方
emotoinでcssの疑似要素を使う場合は下記のような書き方になる
hover.jsx
// 疑似要素の設定const tag=()=>[css`&:hover{background-color:skyblue;}`]
- hover時に背景色を変える場合。
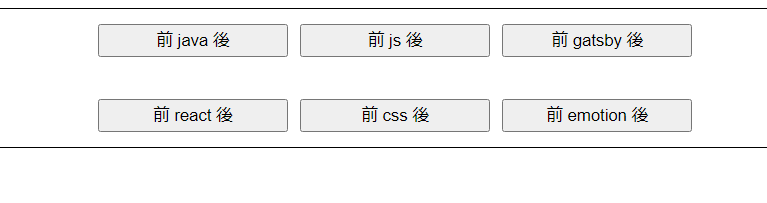
疑似要素のサンプル実装
- after
- before
- hover
を使ったサンプルを実装してみる
App.jsx
/** @jsxImportSource @emotion/react */import { css } from "@emotion/react";export default function App() {// タグ初期値const array = Array.of("java","js","gatsby","react","css","emotion");return (<div className="App"><div css={[tagsGrid]}>{array.map((val, i) => (<button css={[tag]} key={i}>{val}</button>))}</div></div>);}// 疑似要素の設定const tag=()=>[css`&:before{content:"前 "}&:after{content:" 後"}&:hover{background-color:skyblue;}`]const tagsGrid = () => [css`display: grid;grid-template-columns: repeat(3, minmax(100px, 10%));grid-auto-rows: 50px;justify-content: center;align-items: center;gap: 10px;border: 1px solid black;margin: auto;`];
画面イメージ
書き方いろいろ
他の書き方のサンプルを書いてみる
並列で使う
疑似要素を「,」でつなげることがで同時に設定することができる
App.jsx
/** @jsxImportSource @emotion/react */import { css } from "@emotion/react";export default function App() {// タグ初期値const array = Array.of("java","js","gatsby","react","css","emotion");return (<div className="App"><div css={[tagsGrid]}>{array.map((val, i) => (<button css={[tag]} key={i}>{val}</button>))}</div></div>);}// 疑似要素の設定// 「,」で区切って並列で設定することができるconst tag=()=>[css`&:before,&:after{content:"--"}`]const tagsGrid = () => [css`display: grid;grid-template-columns: repeat(3, minmax(100px, 10%));grid-auto-rows: 50px;justify-content: center;align-items: center;gap: 10px;border: 1px solid black;margin: auto;`];
画面イメージ

組み合わせで使う
疑似要素をつなげて書くことで組み合わせで設定することができる
App.jsx
/** @jsxImportSource @emotion/react */import { css } from "@emotion/react";export default function App() {// タグ初期値const array = Array.of("java", "js", "gatsby", "react", "css", "emotion");return (<div className="App"><div css={[tagsGrid]}>{array.map((val, i) => (<button css={[tag]} key={i}>{val}</button>))}</div></div>);}// 疑似要素の設定// 組み合わせで設定することができるconst tag = () => [css`&:hover&:before{content: "・";}`];const tagsGrid = () => [css`display: grid;grid-template-columns: repeat(3, minmax(100px, 10%));grid-auto-rows: 50px;justify-content: center;align-items: center;gap: 10px;border: 1px solid black;margin: auto;`];
- hoverとbeforeを組み合わせている
画面イメージ

参考
新着記事


top