当サイトは、アフィリエイト広告を利用しています
【Next.js】MDXファイルでpageを生成する方法


Next.js × TypeScriptでMDXプラグインを使って
MDXファイルでpageを生成する方法をまとめる。
Next.jsでMDXを扱う方法としては下記の3つのライブラリのうちにどれかを
使う必要がある。
- @next/mdx
- next-mdx-remote
- mdx-bundler
contentfulやmicroCMSなど外部からファイルを取り込む場合は
next-mdx-remoteを使う。
Contentfulから記事ページを生成については下記にまとめています。


今回は同プロジェクト内(local)に配置したmdxファイルを
元にpageを生成するようにしたため「@next/mdx」を使うようにした。
※mdxファイルをpageにすることはnext-mdx-remoteではできないため。
インストール
必要なパッケージをインストールする
yarn add @next/mdx @mdx-js/loader @mdx-js/react
package.jsonは下記になる。
~"dependencies": {"@emotion/cache": "^11.10.5","@emotion/react": "^11.10.5","@emotion/server": "^11.10.0","@emotion/styled": "^11.10.5","@mdx-js/loader": "^2.3.0","@mdx-js/react": "^2.3.0","@mui/icons-material": "^5.11.0","@mui/material": "^5.10.17","@next/mdx": "^13.2.3","@types/node": "18.11.11","@types/react": "18.0.26","@types/react-dom": "18.0.9","babel-plugin-module-resolver": "^4.1.0","eslint": "8.29.0","eslint-config-next": "13.0.6","next": "13.0.6","react": "18.2.0","react-dom": "18.2.0","typescript": "4.9.3"},"devDependencies": {"@emotion/babel-plugin": "^11.10.5"}~
※next.jsでCSS in JSのEmotionも使えるようにしている。
詳しくは下記記事でまとめています。

next.Config.jsの設定
MDXファイルを読み込んでHTMLに変換できるように
next.Config.jsを編集する。
/** @type {import('next').NextConfig} */const nextConfig = {reactStrictMode: true,swcMinify: true,// Configure pageExtensions to include md and mdxpageExtensions: ["ts", "tsx", "js", "jsx", "md", "mdx"],// Optionally, add any other Next.js config belowreactStrictMode: true,};const withMDX = require("@next/mdx")({extension: /\.mdx?$/,options: {// If you use remark-gfm, you'll need to use next.config.mjs// as the package is ESM only// https://github.com/remarkjs/remark-gfm#installremarkPlugins: [],rehypePlugins: [],// If you use `MDXProvider`, uncomment the following line.providerImportSource: "@mdx-js/react",},});module.exports = withMDX(nextConfig);
全部、コピペでok。
詳しくは公式Using MDX with Next.js参照
MDXファイルから記事pageを生成する
MDXファイルから記事pageを生成するために
- MDXファイルの作成
- MDXComponent.tsxの作成
- _app.tsxの編集
をする。
フォルダ構成としては下記のようになる
-src|-components| |-MDXComponent| |-MDXComponent.tsx||-pages| |-api| |-pages| | |-posts| | |-test.mdx||-_app.tsx
posts配下ではなくpages配下でも良いが
mdxファイルはそれでまとめておきたかったので分けてます。
MDXファイルを作成
pageの元となるmdxファイルを作成する
# H1 heading## H2 heading### testThis is a list in markdown:- One- Two- Three
今回はh2,h3タグをcomponentにする。
MDXComponent.tsxの作成
mdxファイル内で使用するcomponentをまとめたcomponentを作成する
import { css } from "@emotion/react";export const MDXComponent = () => {// mdx用コンポーネントconst h3 = (props: any) => {const h3Style = css`margin: 2.8rem 0 1em;padding: 8px 0;padding-left: 7px;border-bottom: 3px solid #c8cbce;border-color: rgb(69, 74, 150);`;// Intersection Observer APIで監視する要素のためclassをつけるreturn <h3 css={h3Style} {...props} className="highLight" />;};// mdx用コンポーネントconst h2 = (props: any) => {const h2Style = css`font-size: 1.125rem;font-weight: bold;padding-top: 9px;padding-bottom: 9px;padding-left: 7px;border-left: 7px solid black;background: rgb(69, 74, 150);color: white;font-family: "Noto Sans JP", Roboto, sans-serif;line-height: 1.2;margin-top: 20px;margin-bottom: 20px;`;return <h2 css={h2Style} {...props} />;};// mdx用コンポーネントをオブジェクト化const components = { h3, h2 };return components;};
- h2,h3タグをEmotionでスタイリングしたcomponentにする
- 作成したcomponentをオブジェクトにしてexportしておく
_app.tsxの編集
MDXProviderを使って、MDXファイルからpage生成時にMDXComponentでまとめて
exportしておいたcomponent(h2,h3)が使えるようにする。
import * as React from "react";import { AppProps } from "next/app";import PropTypes from "prop-types";import Head from "next/head";import { ThemeProvider } from "@mui/material/styles";import CssBaseline from "@mui/material/CssBaseline";import { CacheProvider, EmotionCache } from "@emotion/react";import theme from "@/theme";import createEmotionCache from "@/createEmotionCache";import { Layout } from "@/components/layouts/layouts";import { MDXProvider } from "@mdx-js/react";import { MDXComponent } from "@/components/MDXcomponent/MDXComponent";// Client-side cache, shared for the whole session of the user in the browser.const clientSideEmotionCache = createEmotionCache();interface MyAppProps extends AppProps {emotionCache?: EmotionCache;}function MyApp(props: MyAppProps) {const { Component, emotionCache = clientSideEmotionCache, pageProps } = props;return (<CacheProvider value={emotionCache}><ThemeProvider theme={theme}>{/* CssBaseline kickstart an elegant, consistent, and simple baseline to build upon. */}<CssBaseline /><MDXProvider components={MDXComponent}><Layout><Component {...pageProps} /></Layout></MDXProvider></ThemeProvider></CacheProvider>);}MyApp.propTypes = {Component: PropTypes.elementType.isRequired,emotionCache: PropTypes.object,pageProps: PropTypes.object.isRequired,};export default MyApp;
- _app.tsxでMDXProviderを設定しておけばどのpageでもMDXComponentが使えるようになる
実行してみる
Next.jsを実行してmdxファイルを格納したpath(http://localhost:3000/posts/test)を
を表示すると下記のように表示される
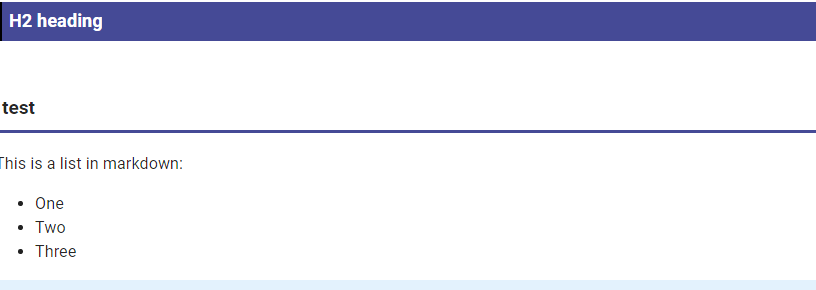
- h2,h3タグはスタイリングしたcomponentの表示になっている。
MDXProviderを使わない場合
MDXProviderを使わない場合は、mdxファイルに直接importを書いて
使うこともできる
sampleComponentを作る
import { css } from "@emotion/react";export const Sample = () => {return (<divcss={[css`margin-top: 100px;`,]}>sampleComponent</div>);};
mdxファイルでimportする
import { Sample } from "@/components/sample/Sample";<Sample /># H1 heading## H2 heading### testThis is a list in markdown:- One- Two- Three
実行すると
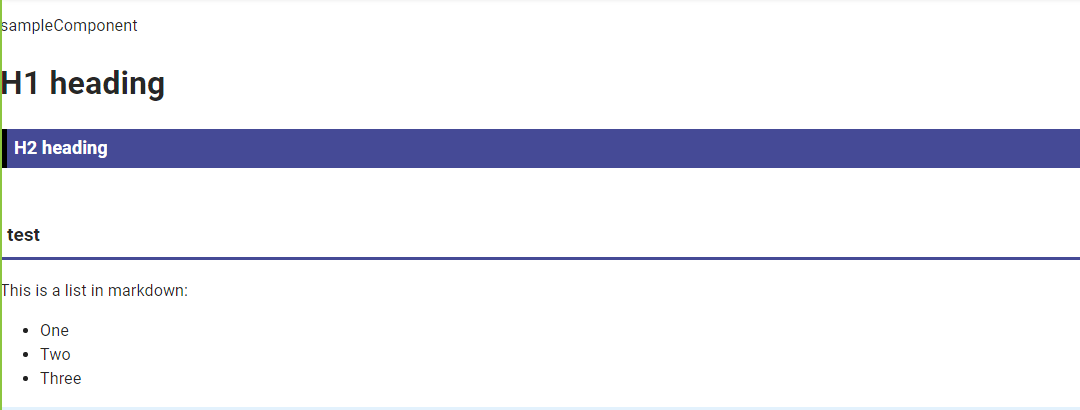
- Sampleコンポーネントが表示される。
まとめ
今回はcontenfulではなくプロジェクト内のmdxファイルを元にpageを作成してみたが
packageを入れて、mdxファイルを配置するだけで表示させることができた
簡単なpageをmdxファイルで作るには「@next/mdx」を使うのはありかもしれないが
細かいことをする場合は少し手順は複雑になるが「next-mdx-remote」を使う方がいいと思う。


