当サイトは、アフィリエイト広告を利用しています
【Gatsby 】目次クリックでsmoothにscrollさせる
ReactのGatsby製のブログの目次クリック時に対象の箇所まで
scrollする際、スムーズにscrollさせる方法をメモ。
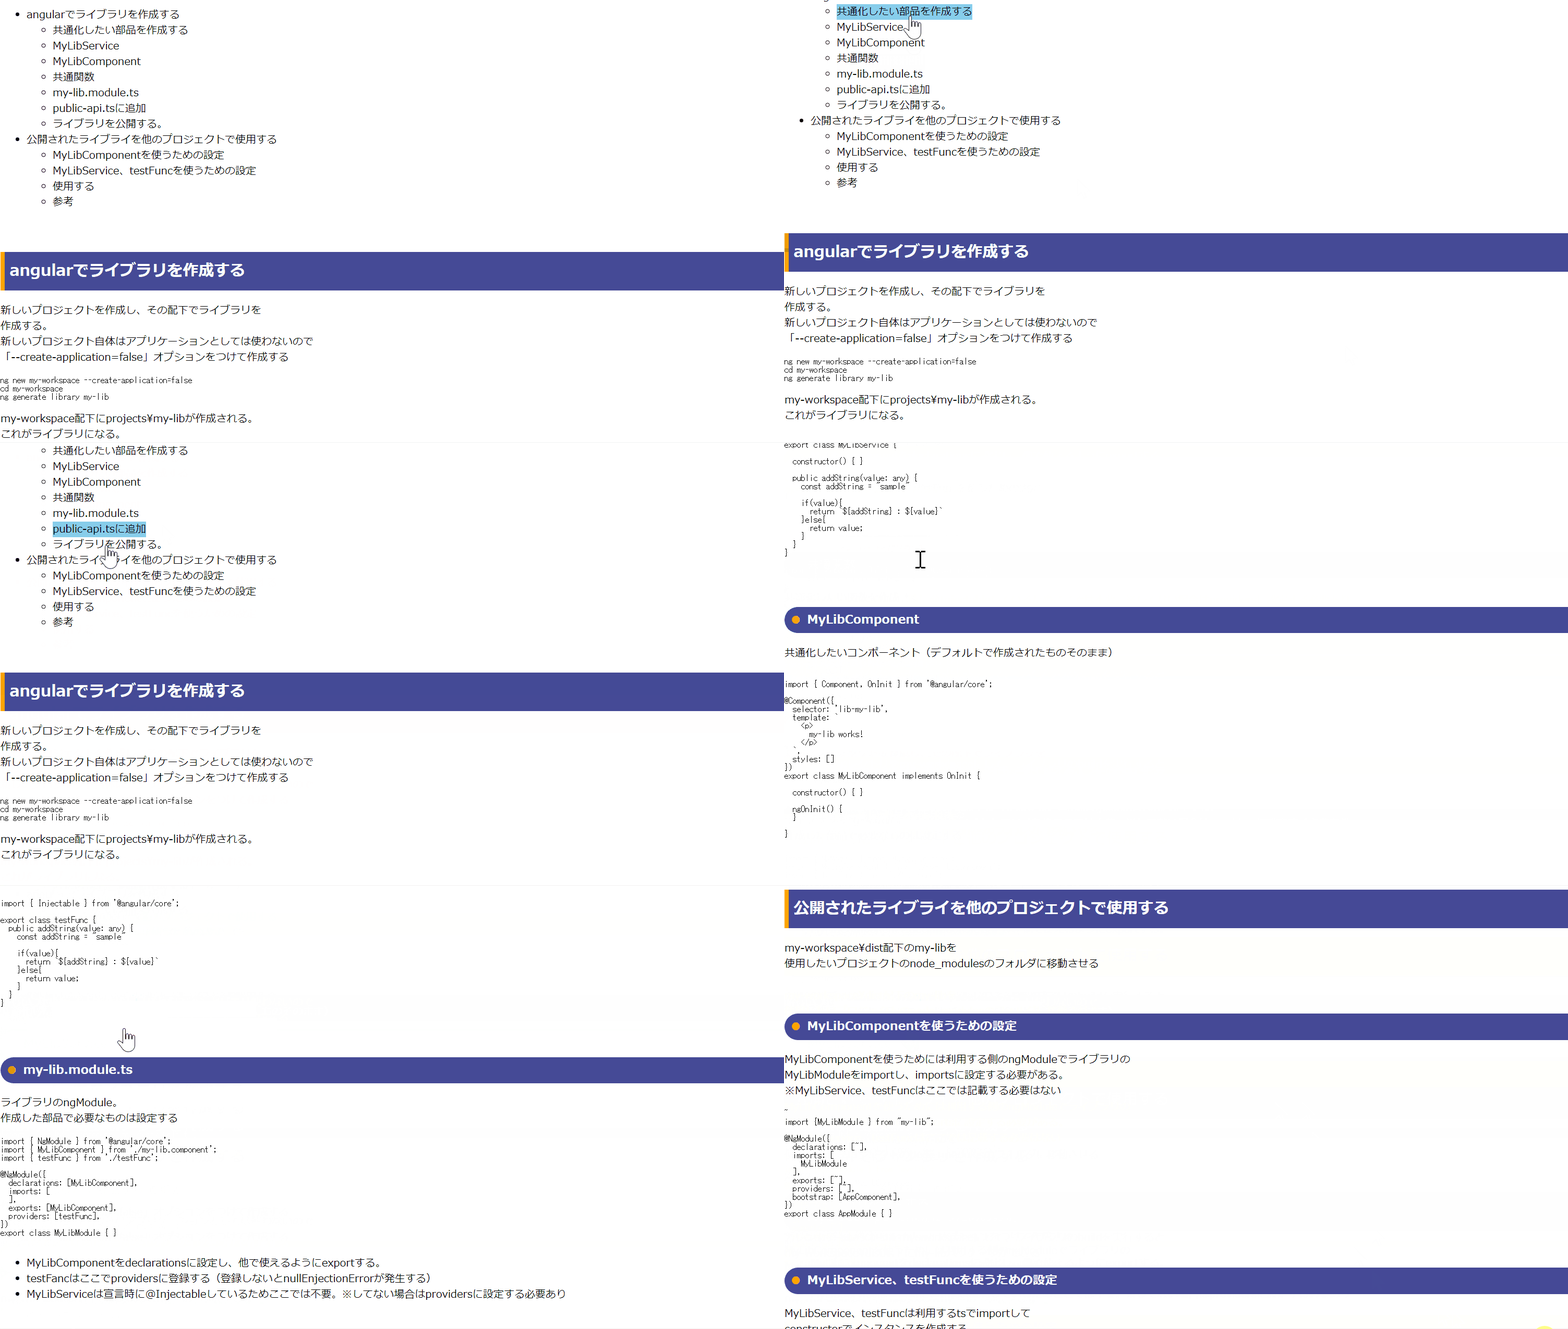
スムーズにする対応をする前と後では下記のように動きが変わる
【対応前】
【対応後】
下記のプラグインとパッケージを使って実現する
- react-scroll
- gatsby-remark-autolink-headers
前提
下記の前提条件の上で実装してみる
- Gatsby製ブログの記事をcontentfulで管理していること
- Gatsby製ブログの記事をMDX形式にしていること
- 記事から目次生成していること
「Gatsby製のブログの記事をcontentful × MDX形式」で管理して
表示する方法については
で紹介しています。
また記事から目次を作成する方法については
で紹介しています。
「【Gatsby × contentful】MDX形式記事の目次をつける方法」で使用したソースを元に
変更を加えているので、当記事を読む前に先に参照してほしいです!
必要なプラグインとパッケージのインストール
「gatsby-remark-autolink-headers」と「react-scroll」をインストールする。
gatsby-remark-autolink-headers
MDXまたMDで書いた記事の見出し要素(h1、h2、h3など)にidを入れてくれるプラグイン。
gatsby-remark-autolink-headersを使ってidをつけて、目次をクリックした際に移動させる位置を
決める。
yarn add gatsby-remark-autolink-headers
react-scroll
スムーズにscrollさせるためのパッケージ。
yarn add react-scroll
gatsby-config.jsの設定
インストールしたプラグインをgatsby-config.jsに追記する。
※追記しないと動かない。
require("dotenv").config({path: `.env.${process.env.NODE_ENV}`,})module.exports = {~plugins: [`gatsby-plugin-image`,`gatsby-transformer-sharp`,`gatsby-plugin-sharp`,{resolve: `gatsby-source-contentful`,options: {spaceId: process.env.spaceId,accessToken: process.env.accessToken,},},{resolve: `gatsby-plugin-mdx`,options: {gatsbyRemarkPlugins: [// 他にRemarkプラグインがある場合はここに追加していく`gatsby-remark-autolink-headers`,],},},`gatsby-plugin-react-helmet`,],}
- MDXで記事を書いているためgatsby-plugin-mdxのオプションに追加する。
react-scrollを使ってscrollを実装する。
react-scrollはgatsbyのプラグインではないため、gatsby-config.jsへの追記は不要。
react-scrollのLinkを使うことでscrollを実現する。
目次コンポーネントを作成する
「【Gatsby × contentful】MDX形式記事の目次をつける方法」で作成した目次コンポーネントを
react-scrollを使うように変更する。
import React from "react"import { css } from "@emotion/react"import { Link } from "react-scroll"const MdxIndex = ({ items }) => {return (<ul>{items.map(item => (<li key={item.url}><Linkcss={[hover]}to={item.url && item.url.replace("#", "")}offset={-10}duration={600}smooth>{/* {item.url} */}{item.title}</Link>{/* 再帰的に呼び出す */}{item.items && <MdxIndex items={item.items} />}</li>))}</ul>)}export default MdxIndexconst hover = () => {return [css`&:hover {background-color: skyBlue;}cursor: pointer;`,]}
- Linkはreact-scrollのものを使う
- 「to」は#があると正常に動作しないので""に置き換える
react-scrollのLinkのプロパティについて
- activeClass - 要素に達したときに適用されるクラスが適用されます。
- to - スクロール先のターゲット。
- spy - scrollがターゲットの位置にあるとき、Linkを選択させます。
- smooth - スクロールをアニメーション化します。
- offset- 追加 px分(パディングのように)スクロールします。
- duration -スクロールアニメーションの完了までにかかる時間数字か関数が入ります。
詳細は下記参照
templateコンポーネントで目次コンポーネントを使う
変更した目次コンポーネントをtemplateコンポーネント(記事コンポーネント)
から使う
import React from "react"import { graphql, Link } from "gatsby"import MDXConvert from "../components/mdxConvert"import MdxIndex from "../components/MdxIndex"import { css } from "@emotion/react"const ContentfulPost = ({ data }) => {const post = data.allContentfulBlogPost.edges[0].nodeconst { body } = postreturn (<div><MdxIndex items={body.childMdx.tableOfContents.items} /><MDXConvert>{body.childMdx.body}</MDXConvert></div>)}export default ContentfulPost// gatsby-node.jsのcreatePageから渡されたslugを元にGraphQLで記事と// その目次データ取得するexport const query = graphql`query Query($slug: String!) {allContentfulBlogPost(filter: { slug: { eq: $slug } }) {edges {node {body {childMdx {tableOfContentsbody}}}}}}`
まとめ
ReactやGatsbyでスムースにscrollさせる方法は探すといくつかあったが
色々ためしてみた結果、最終的にreact-scrollを使用する方法が一番動作が安定していたため、
採用した。

