当サイトは、アフィリエイト広告を利用しています
【Gatsby × contentful】MDX形式でcontentful記事を表示する
作成日:2022月09月30日
更新日:2023年11月20日


当ブログではcontentfulにmarkdown形式で記事データを格納し
Gatsbyでcontentfulから記事をMDX形式で取得して扱っているので
今回はその方法(下記3点)を
- contentfulでマークダウンを利用する方法
- contentfulから記事をMDX形式で取得する方法
- contentful取得したMDX記事をhtmlに変換して表示する方法
をまとめてみる
今回はcontentfulから取得した記事をGatsbyで動的ページ生成する際
gatsby-node.jsでcreatePagesAPIを使っている。
Gatsbyのv4から導入された「FileSystemRouteAPI」を使う方法もあるので
そちらについては下記の記事で紹介しています


動作確認環境
下記の環境で動作しています。
package.json
{"dependencies": {"@babel/preset-react": "^7.17.12","@emotion/babel-plugin": "^11.9.2","@emotion/react": "^11.9.0","@emotion/styled": "^11.8.1","@mdx-js/mdx": "1.6.22","@mdx-js/react": "1.6.22","dotenv": "^16.0.2","gatsby": "^4.14.1","gatsby-plugin-emotion": "^7.14.0","gatsby-plugin-feed": "^4.14.0","gatsby-plugin-gatsby-cloud": "^4.14.0","gatsby-plugin-google-analytics": "^4.14.0","gatsby-plugin-image": "^2.24.0","gatsby-plugin-manifest": "^4.14.0","gatsby-plugin-mdx": "3.20.0","gatsby-plugin-offline": "^5.14.1","gatsby-plugin-react-helmet": "^5.14.0","gatsby-plugin-sharp": "^4.14.1","gatsby-remark-copy-linked-files": "^5.14.0","gatsby-remark-images": "^6.14.0","gatsby-remark-prismjs": "^6.14.0","gatsby-remark-responsive-iframe": "^5.14.0","gatsby-remark-smartypants": "^5.14.0","gatsby-source-contentful": "^7.21.1","gatsby-source-filesystem": "^4.14.0","gatsby-transformer-sharp": "^4.14.0","prismjs": "^1.28.0","react": "^17.0.1","react-dom": "^17.0.1","react-helmet": "^6.1.0","typeface-merriweather": "0.0.72","typeface-montserrat": "0.0.75"},"devDependencies": {"prettier": "^2.6.2"},}
node.jsのversionは16.16.0
contentfulでマークダウンを利用する方法
まずはcontentfulで記事をmarkdown形式で利用できるようにする。
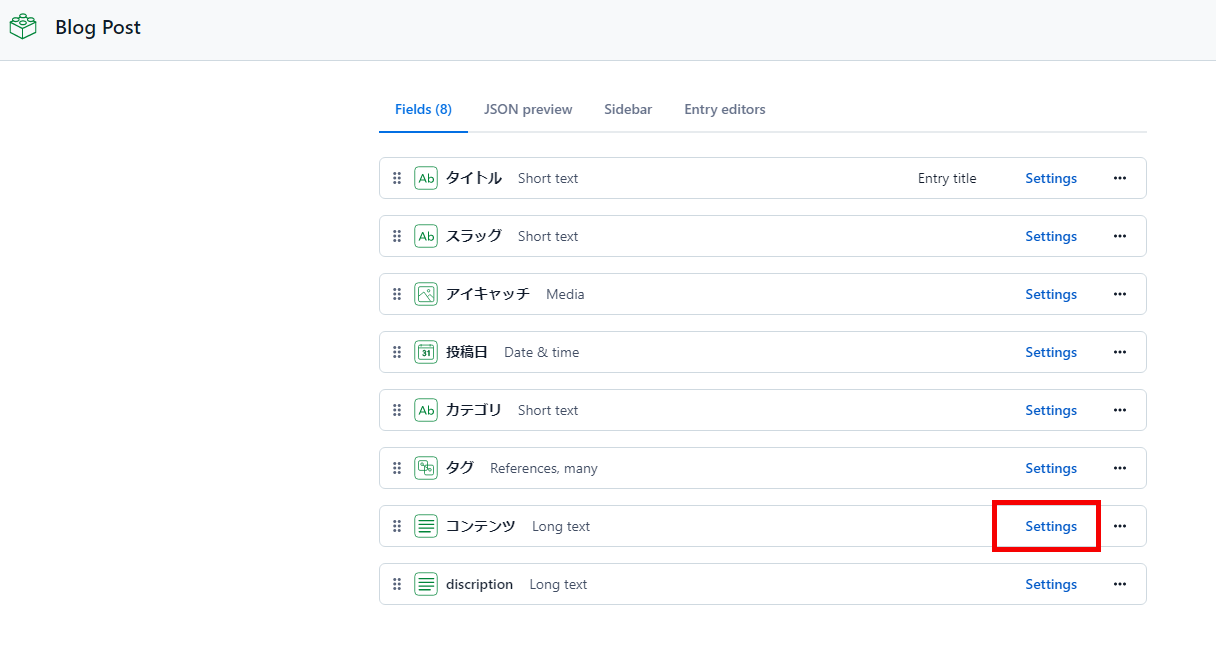
markdownで扱うの記事本体のみのため作成したContentModelのうち記事に該当する
Fieldsの「Appearance」をMarkdownにする。
コンテンツのsettingを選択
AppearanceをMarkdownにする
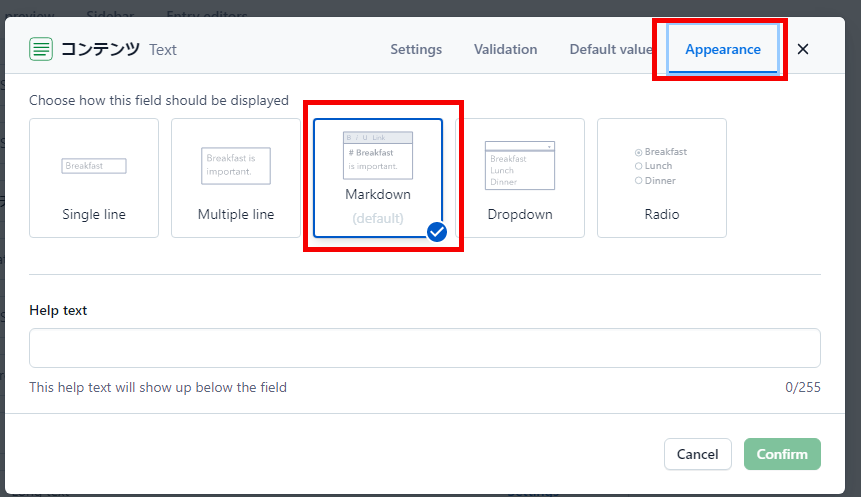
これでcontentfulで記事をMarkdownで扱える。
※新規でFieldsを作成する場合は「Text」→ 「Long text」で作成して上記と同様の設定をする
contentfulではMDX形式は用意されていないのでMarkdown形式にしておく。
contentfulのMarkdown記事内にcomponentを書いて
Gatsby側でMDX形式として読み込めば問題なく動作する。
APIキーを発行する
Gatsbyとcontentfulを連携させるためにcontentfulでAPIkeyを作成しておく
SettingのAPIkesを選択
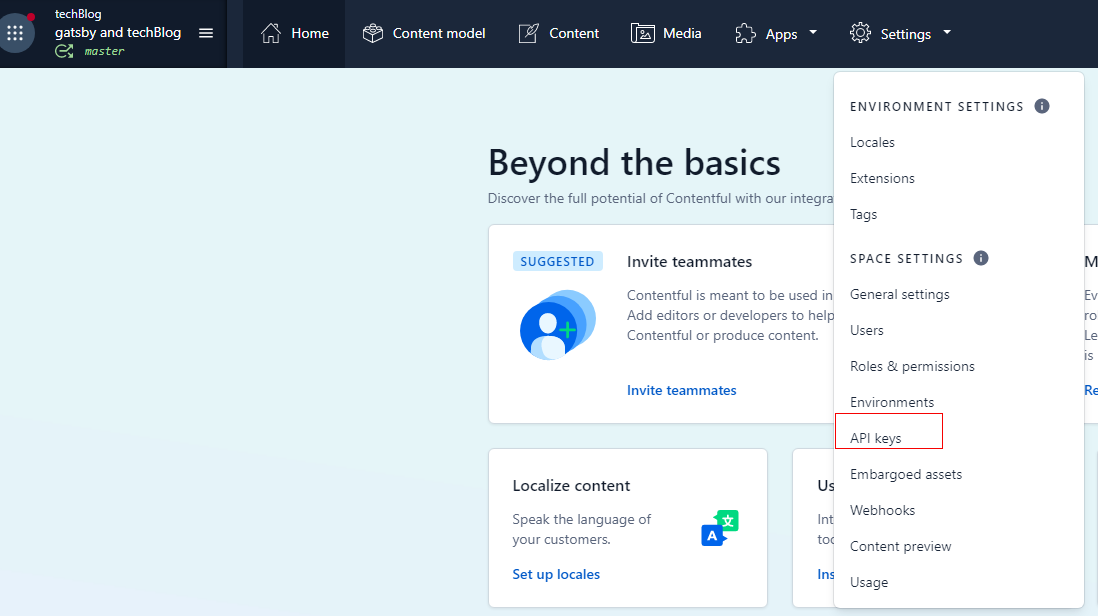
Add API Keyを押してAPI Keyを作る
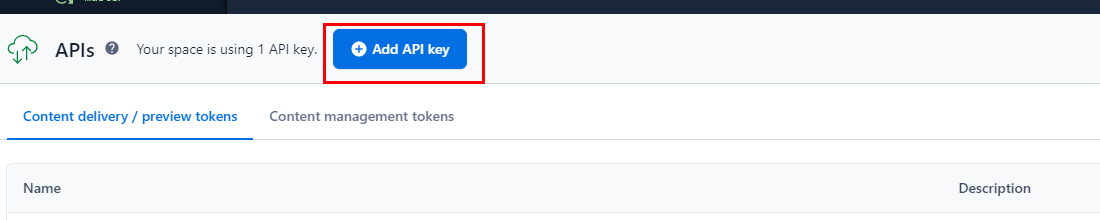
「Space ID」と「Content Delivery API - access token」を覚えておく
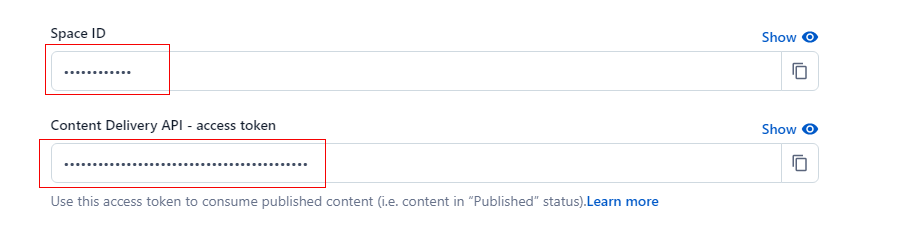
この二つは後でGatsby側で設定する。
※ブログを公開する時はnetlifyでも設定する必要あり。
contentfulから記事を取得する方法
contentfulから記事を取得するためには必要なパッケージをインストールし
GraghQLで取得する。
.envファイルを作成する
contentfulで作成したAPIキーをプロジェクト直下に.envファイルを作成し記載する
.env.development
spaceId=xxxxxxxxxxxxaccessToken=xxxxxxxxxxxxxxxxxxxxxxxxxxxxxxxxxxxxxxxxxxx
.env.developmentはデフォルトで.gitignoreに追加されているため
バージョン管理されずローカルにのみ保存され外部に公開されることはない
dotenv
環境変数をファイルから利用するためのライブラリ
GitBash
yarn add dotenv
gatsby-config.jsに設定を追加する
contentfulから記事データを取得するためのAPIキーを
環境変数で設定できるようにする
gatsby-config.js
require("dotenv").config({path: `.env.${process.env.NODE_ENV}`,})module.exports = {siteMetadata: {title: `Gatsby Starter Blog`,author: {name: `Kyle Mathews`,summary: `who lives and works in San Francisco building useful things.`,},description: `A starter blog demonstrating what Gatsby can do.`,siteUrl: `https://gatsbystarterblogsource.gatsbyjs.io/`,social: {twitter: `kylemathews`,},},plugins: [{resolve: `gatsby-plugin-manifest`,options: {name: `Gatsby Starter Blog`,short_name: `GatsbyJS`,start_url: `/`,background_color: `#ffffff`,display: `minimal-ui`,},},`gatsby-plugin-react-helmet`,],}
gatsby-source-contentful
contentfulデータをGraghQLで取得できるようにするパッケージ。
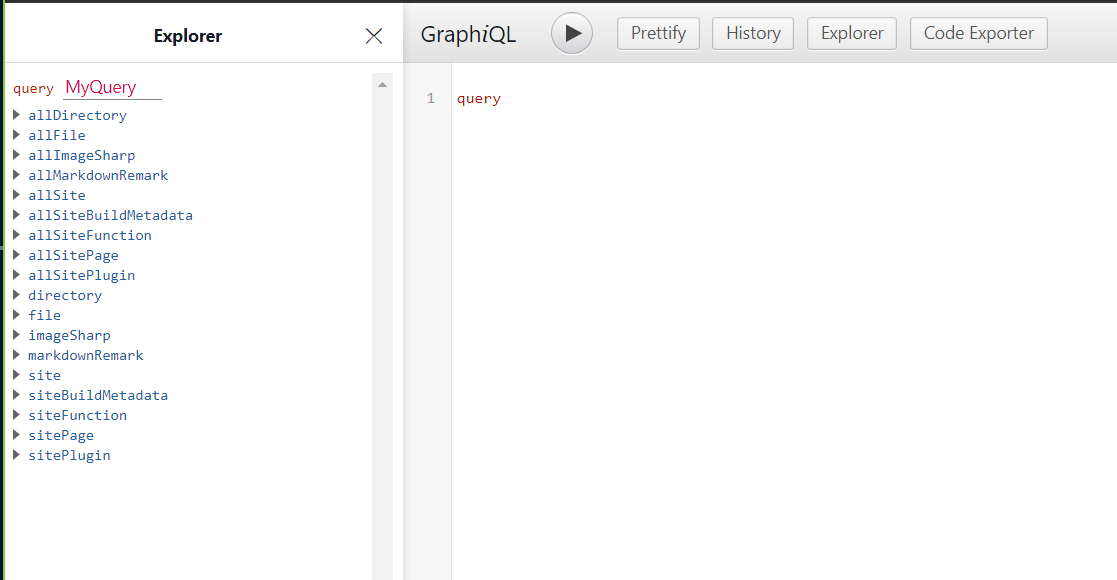
このパッケージを入れるまえのGraghQLでは下記のようにcontentfulデータを取得する項目がない。
gatsby-source-contentfulをインストールする
GitBash
yarn add gatsby-source-contentful
gatsby-config.jsに設定を追加する
gatsby-config.js
require("dotenv").config({path: `.env.${process.env.NODE_ENV}`,})module.exports = {siteMetadata: {title: `Gatsby Starter Blog`,author: {name: `Kyle Mathews`,summary: `who lives and works in San Francisco building useful things.`,},description: `A starter blog demonstrating what Gatsby can do.`,siteUrl: `https://gatsbystarterblogsource.gatsbyjs.io/`,social: {twitter: `kylemathews`,},},plugins: [{resolve: `gatsby-plugin-manifest`,options: {name: `Gatsby Starter Blog`,short_name: `GatsbyJS`,start_url: `/`,background_color: `#ffffff`,// This will impact how browsers show your PWA/website// https://css-tricks.com/meta-theme-color-and-trickery/// theme_color: `#663399`,display: `minimal-ui`,icon: `src/images/gatsby-icon.png`, // This path is relative to the root of the site.},},{resolve: `gatsby-source-contentful`,options: {spaceId: process.env.spaceId,accessToken: process.env.accessToken,},},`gatsby-plugin-react-helmet`,],}
GraghQLでのcontentfulデータの取得確認
ここまでできた段階で一度、gatsby developでを実行し、「http://localhost:8000/___graphql」で
contentfulのデータである
- allContentfulBlogPost
がGraghQLで取得できるようになっているか確認する。
※ローカルのMarkdownファイルからtempleateでページを作成しているスターターを使っていた場合
エラーを吐きまくるが一旦は気にしない...
うまく取得できていれば下記にようになる
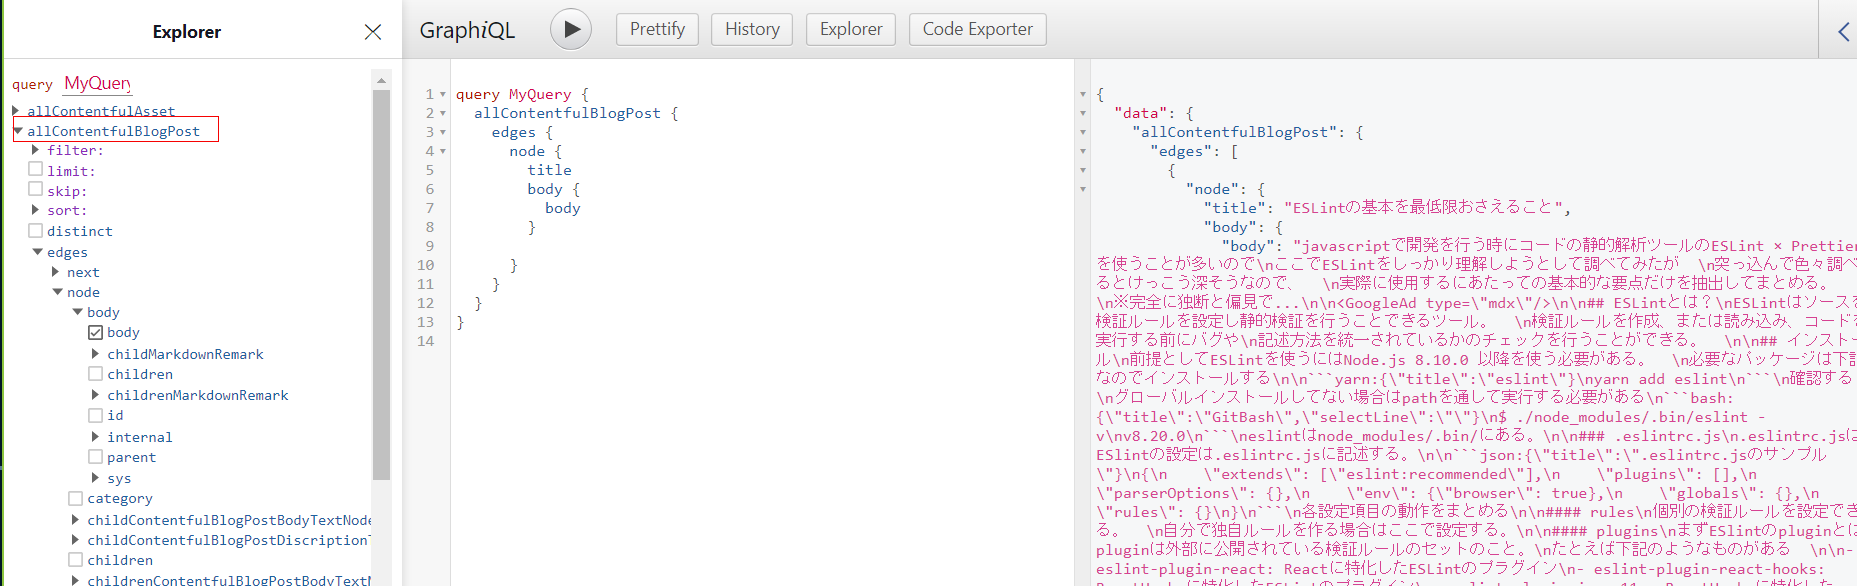
GraghQLでのcontentfulデータ自体はとれている
gatsby developが失敗し「http://localhost:8000/___graphql」自体が実行できない場合は一度
- node_modules
- yarn.lock
- .cache
を削除して再度、yarn installすればgatsby developで起動できるようになる。
gatsby-plugin-mdx
MDXファイルを解析してパースする(ノードに変換する)するプラグイン。
gatsby-plugin-mdxをインストールする
公式ドキュメントをみると
gatsby-plugin-mdxのv4ではファイルシステム以外からの取得には対応していないようなので
v3の最新をインストールする。
@mdx-js/mdxと@mdx-js/reactも後で必要になるので一緒にインストールしておく。
この二つもgatsby-plugin-mdxのv3に対応しているのはv1なのでv1の最新をいれるようにする
GitBash
yarn add gatsby-plugin-mdx@3.20.0 @mdx-js/react@1.6.22 @mdx-js/mdx@1.6.22
gatsby-config.jsに設定を追加する
gatsby-config.js
require("dotenv").config({path: `.env.${process.env.NODE_ENV}`,})module.exports = {siteMetadata: {title: `Gatsby Starter Blog`,author: {name: `Kyle Mathews`,summary: `who lives and works in San Francisco building useful things.`,},description: `A starter blog demonstrating what Gatsby can do.`,siteUrl: `https://gatsbystarterblogsource.gatsbyjs.io/`,social: {twitter: `kylemathews`,},},plugins: [`gatsby-plugin-image`,`gatsby-transformer-sharp`,`gatsby-plugin-sharp`,{resolve: `gatsby-plugin-manifest`,options: {name: `Gatsby Starter Blog`,short_name: `GatsbyJS`,start_url: `/`,background_color: `#ffffff`,// This will impact how browsers show your PWA/website// https://css-tricks.com/meta-theme-color-and-trickery/// theme_color: `#663399`,display: `minimal-ui`,icon: `src/images/gatsby-icon.png`, // This path is relative to the root of the site.},},{resolve: `gatsby-source-contentful`,options: {spaceId: process.env.spaceId,accessToken: process.env.accessToken,},},{resolve: `gatsby-plugin-mdx`,options: {gatsbyRemarkPlugins: [// 他にRemarkプラグインがある場合はここに追加していく],},},`gatsby-plugin-react-helmet`,],}
再度、[gatsby develop]でGraphQLを見てみるとcontentfulのデータをchildMDXが取得できるようになっている
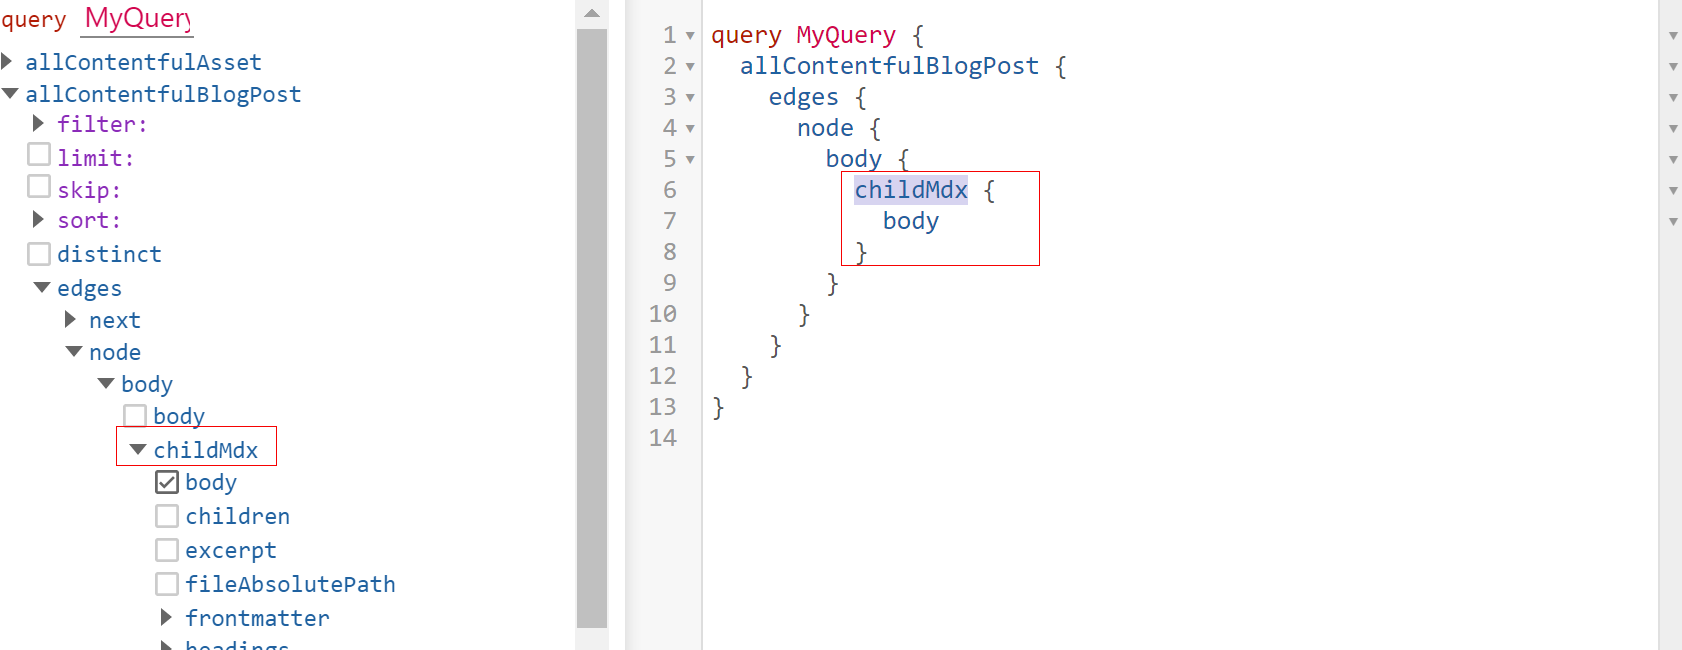
ここまでてcontentfulのmarkdown形式の記事データをMDX形式で取得ができるようになった。
contentful取得した記事を表示する
GraghQLを使って取得したcontentfulデータを使ってSSGで動的に静的ページを生成する。
SSGでのページ生成は下記は下記のような仕組みになる
MDXProviderコンポーネントを実装
- MDX内で使用するコンポーネントを作成してまとめる
- contenfulの記事データ(MDX形式)をhtmlに変換するコンポーネントを作成
gatsby-node.jsの実装
- GraghQLでcontenfulの記事データのキー(slug)を取得する
- contenfulの記事データのキー(slug)とtemplateコンポーネントに渡してpageを作成する
ページ生成の元となるtemplateコンポーネントを実装
- GraghQLでcontenfulの記事データをgatsby-node.jsから連携されたキー(slug)で取得する
- 取得したcontenfulの記事データをMDXProviderコンポーネントでhtmlに変換する
MDXProviderコンポーネントを実装
MDX形式ではmarkdown記事内にコンポーネントを書いているので、そのコンポーネントを
認識させて上でhtmlに変換する必要がある。
MDX内で使用するコンポーネントを作成してまとめる。
MDX内で使用するコンポーネントは全てここでまとめておく。
components/mdxComponent.jsx
import React from "react"import { css } from "@emotion/react"// 指定の文を装飾するconst MdxComponent = props => {const { type } = propsconst style = type => [css`color: ${type == "red" ? "red" : "blue"};`,]return <div css={[style(type)]} {...props} />}// h2タグの文を装飾するconst h2 = props => {const h2Style = css`margin-top: 4rem;font-weight: bold;padding-top: 15px;padding-bottom: 15px;padding-left: 7px;border-left: 7px solid orange;background: rgb(69, 74, 150);color: white;font-family: "Noto Sans JP", Roboto, sans-serif;line-height: 1.2;`return <h2 css={h2Style} {...props} />}// h3タグの文を装飾するconst h3 = props => {const h3Style = css`margin: 4rem 0 1em;color: white;padding: 0.5rem; /*文字周りの余白*/line-height: 1.3; /*行高*/background: rgb(69, 74, 150);vertical-align: middle;border-radius: 25px 0px 0px 25px; /*左側の角を丸く*/&:before {content: "●";color: orange;margin-right: 8px;}`return <h3 css={h3Style} {...props} />}// h4タグの文を装飾するconst h4 = props => {const h4Style = css`margin: 4rem 0 1em;position: relative;padding-left: 25px;&:before {position: absolute;content: "";bottom: -3px;left: 0;width: 0;height: 0;border: none;border-left: solid 15px transparent;border-bottom: solid 15px orange;}&:after {position: absolute;content: "";bottom: -3px;left: 10px;width: 100%;border-bottom: solid 3px orange;}`return (<h4 css={h4Style} {...props}>{props.children}</h4>)}// h5タグの文を装飾するconst h5 = props => {const h5Style = css`margin-top: 4rem;margin-bottom: 0;display: inline-block; /*行部分のみ*/padding: 2px 0;border-bottom: 1px solid orange;`return (<h5 css={h5Style} {...props} className="highLight">{props.children}</h5>)}export { h2, h3, h4, h5, MdxComponent }
今回はサンプルとして下記のコンポーネントをMDX内で使用できるように作成する
- 任意の文字列のスタイリングを行うコンポーネント
- h2~h5タグのスタイリングを行うコンポーネント
最後に作成したコンポーネントをexportしておく。
※MDX内で使用できるコンポーネントはここ全て作成しておかないと使用できない。
contenfulの記事データ(MDX形式)をhtmlに変換するコンポーネントを作成
先にインストールしておいた@mdx-js/reactのMDXProviderとgatsby-plugin-mdxのMDXRendererを
使ってcontenfulの記事データ(MDX形式)をhtmlに変換できるコンポーネントを作成する
components/MDXConvert.jsx
import React from "react"import { MDXRenderer } from "gatsby-plugin-mdx"import { MDXProvider } from "@mdx-js/react"import { h2, h3, h4, h5, MdxComponent } from "../mdxComponent"// importしたcomponentをセットするconst mdxComponents = {h2,h3,h4,h5,MdxComponent,}const MDXConvert = ({ children }) => (<div>{/* MDXProviderで独自に作成したコンポーネントをpropsで渡す */}<MDXProvider components={mdxComponents}>{/* MDXRendererでコンテンツを表示 */}<MDXRenderer>{children}</MDXRenderer></MDXProvider></div>)export default MDXConvert
chidrenにはGraphqlで取得したcontentfulの記事データ(MDX)を渡す。
gatsby-node.jsの実装
動的にslugとページを作成するためにnodeの設定ファイルであるgatsby-node.jsファイルを
プロジェクト直下に作成する。
デフォルトではこのファイルは存在しないので手動で作成する必要がある。
gatsby-node.jsに記述したコードはビルド(gatsby develop)する際に実行される。
記事ページを作成する
createPagesを使って、graphQLでcontetfulの記事のkey(slug)を取得して、
それをtemplateコンポーネントに連携して記事ページを作成する
gatsby-node.js
const path = require(`path`)exports.createPages = async ({ graphql, actions }) => {const { createPage } = actions// contentful記事のkeyを取得const contentfulAirticleResult = await graphql(`query airticleQuery {allContentfulBlogPost {edges {node {slug}}}}`)const contentfulAirticle =contentfulAirticleResult.data.allContentfulBlogPost.edges//記事数分ループして記事ページを作成するcontentfulAirticle.forEach(({ node }) => {createPage({path: `${node.slug}/`, //記事ページのurlcomponent: path.resolve(`./src/templates/contentfulPost.jsx`), //記事ページ作成のtemplateコンポーネント//templateコンポーネントに渡す引数context: {slug: node.slug,},})})}
- GraghQLでcontenfulの記事データのキー(slug)を取得する
- contenfulの記事データのキー(slug)とtemplateコンポーネントに渡してpageを作成
ページ生成の元となるtemplateコンポーネントを作成する
templateコンポーネントを作成する。
gatsby-node.jsのcreatePageから渡された情報を元に記事ページを作る
※今回はcontentful記事データを表示する方法のみにスポットを当てているため
headerコンポーネントやfooterコンポーネントなどは作成しない。
templates/contentfulPost.jsx
import React from "react"import { graphql } from "gatsby"import MDXConvert from "../components/mdxConvert"const ContentfulPost = ({ data }) => {const post = data.allContentfulBlogPost.edges[0].nodeconst { body } = post// MDX形式の記事データをMDXConvertでhtmlに変換するreturn <MDXConvert>{body.childMdx.body}</MDXConvert>}export default ContentfulPost// gatsby-node.jsのcreatePageから渡されたslugを元にGraphQLで記事を取得するexport const query = graphql`query Query($slug: String!) {allContentfulBlogPost(filter: { slug: { eq: $slug } }) {edges {node {body {childMdx {body}}}}}}`
- GraghQLでcontenfulの記事データをgatsby-node.jsから連携されたキー(slug)で取得する
- 取得したcontenfulの記事データをMDXConvertコンポーネントでhtmlに変換する
これでcontentfulの記事(MDX形式)を記事ページ(html)で表示できる
実際に表示させてみる
MDX形式のサンプル記事をcontenfulに作成し、実際に表示させてみる
contentfulに記事作成
components/mdxComponent.jsxで作成したコンポーネントを使うようにする
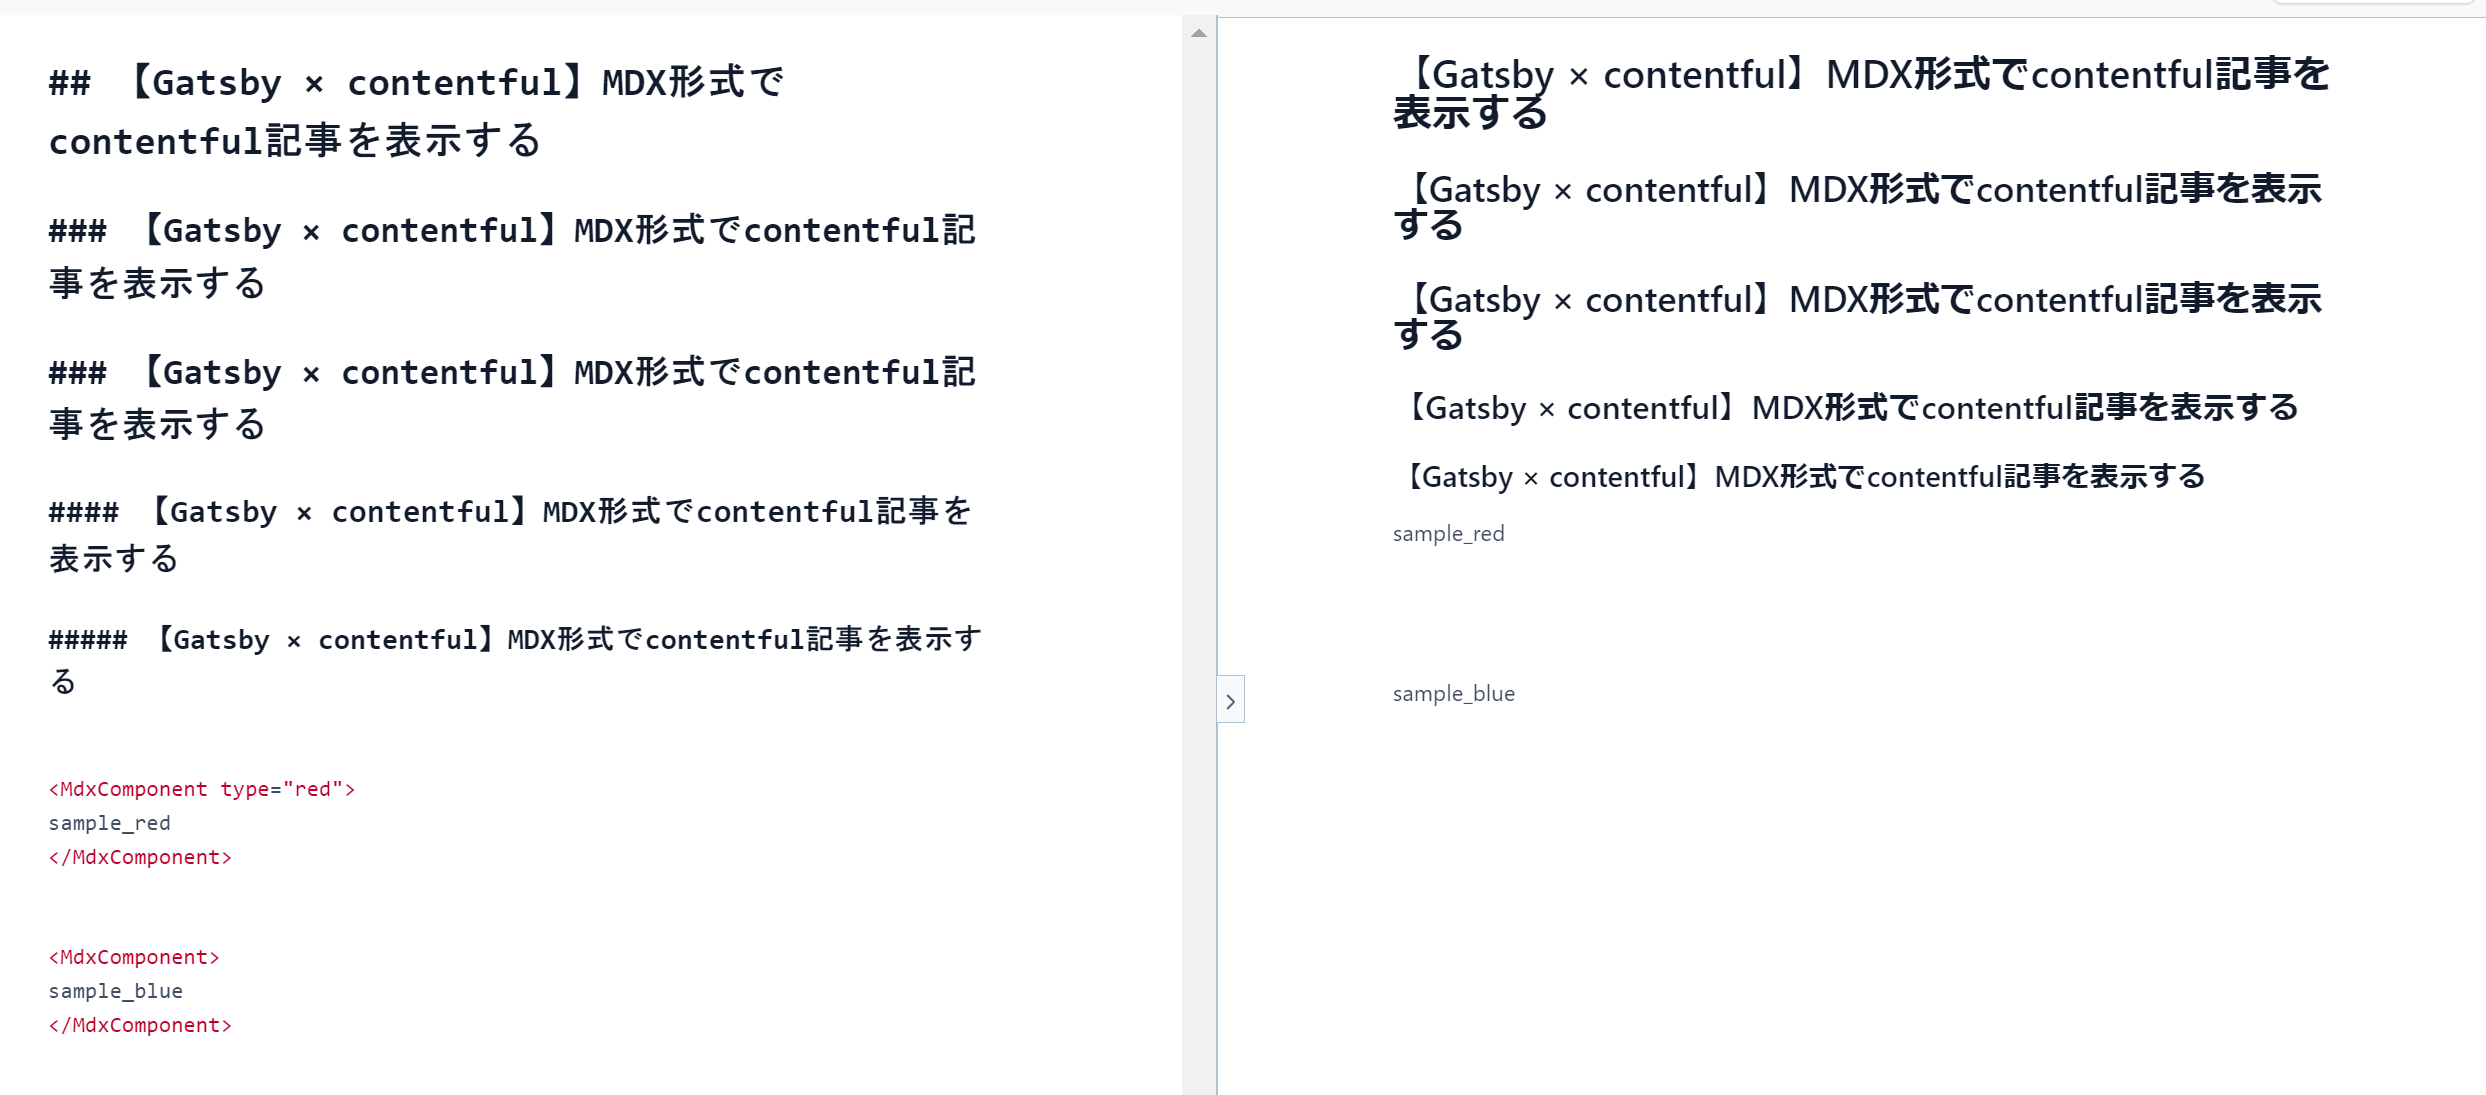
【Gatsby × contentful】MDX形式でcontentful記事を表示する
## 【Gatsby × contentful】MDX形式でcontentful記事を表示する### 【Gatsby × contentful】MDX形式でcontentful記事を表示する### 【Gatsby × contentful】MDX形式でcontentful記事を表示する#### 【Gatsby × contentful】MDX形式でcontentful記事を表示する##### 【Gatsby × contentful】MDX形式でcontentful記事を表示する<MdxComponent type="red">sample_red</MdxComponent><MdxComponent>sample_blue</MdxComponent>
- "##"はh2タグに変換される(h3~h5も同様)
- MdxComponentは任意の文字列を装飾するコンポーネント
実際は下記ような感じ
記事一覧ページを作る
記事ページを表示するまでの一覧ページがないのでpagesフォルダのindex.jsxで
記事一覧を表示させるようにする
pages/index.jsx
import * as React from "react"import { Link, graphql } from "gatsby"const BlogIndex = ({ data }) => {const nodeList = data.allContentfulBlogPost.edgesreturn (// 取得したタイトルを一覧で表示する<div>{nodeList.map(({ node }) => {return (<div><Link to={node.slug}>{node.title}</Link></div>)})}</div>)}export default BlogIndex// 記事のタイトルとslugを取得export const pageQuery = graphql`query {allContentfulBlogPost {edges {node {titleslug}}}}`
リンクさせたタイトルを並べただけのセンスのかけらもないページ...
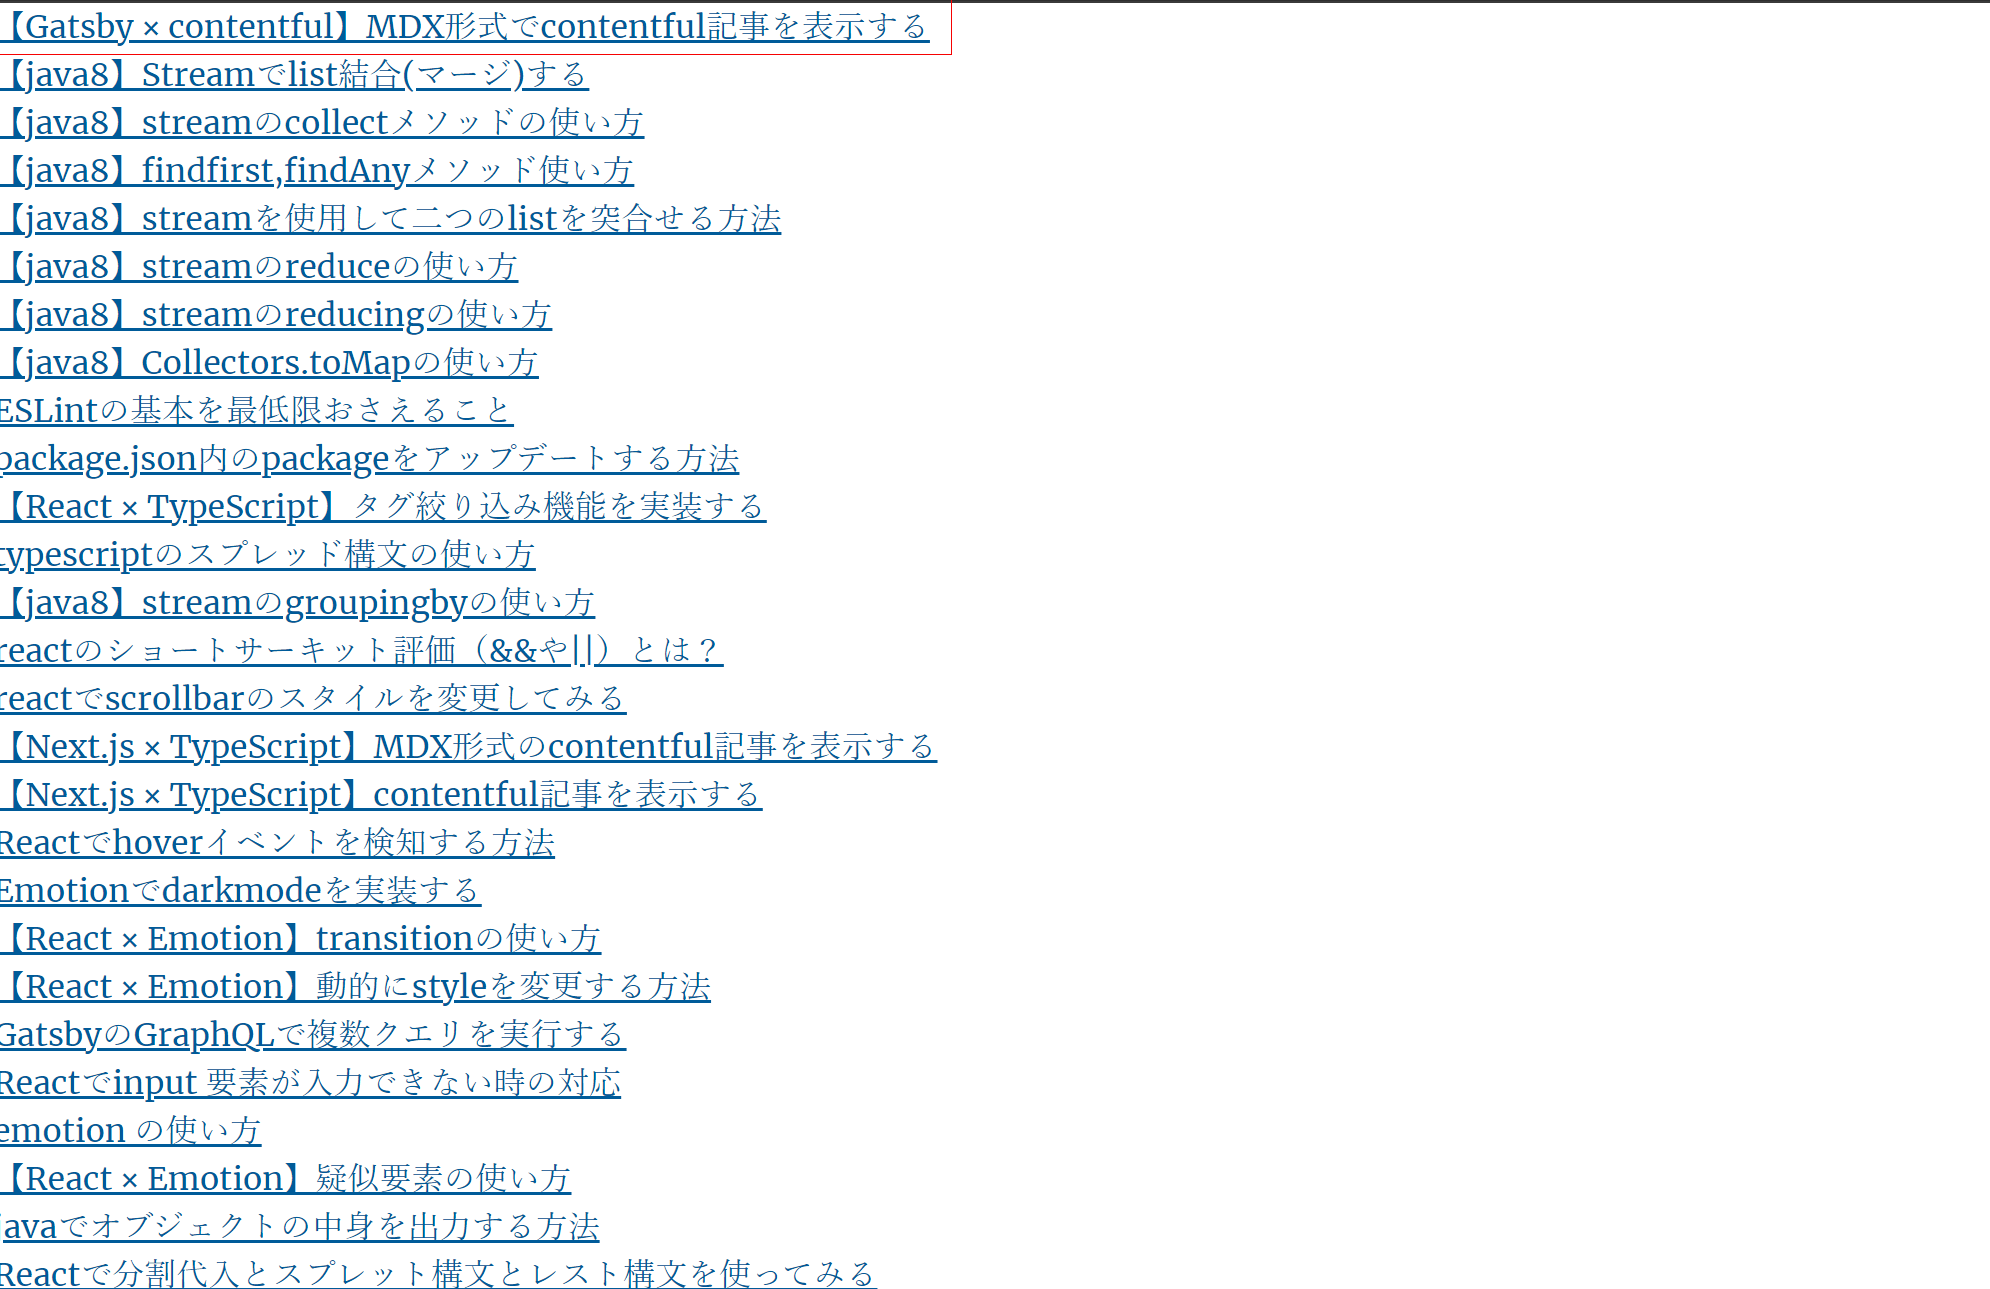
※今回の本題とは違うので手抜きです。
記事ページを表示する
contentfulで作成した記事ページを表示すると下記のようになる
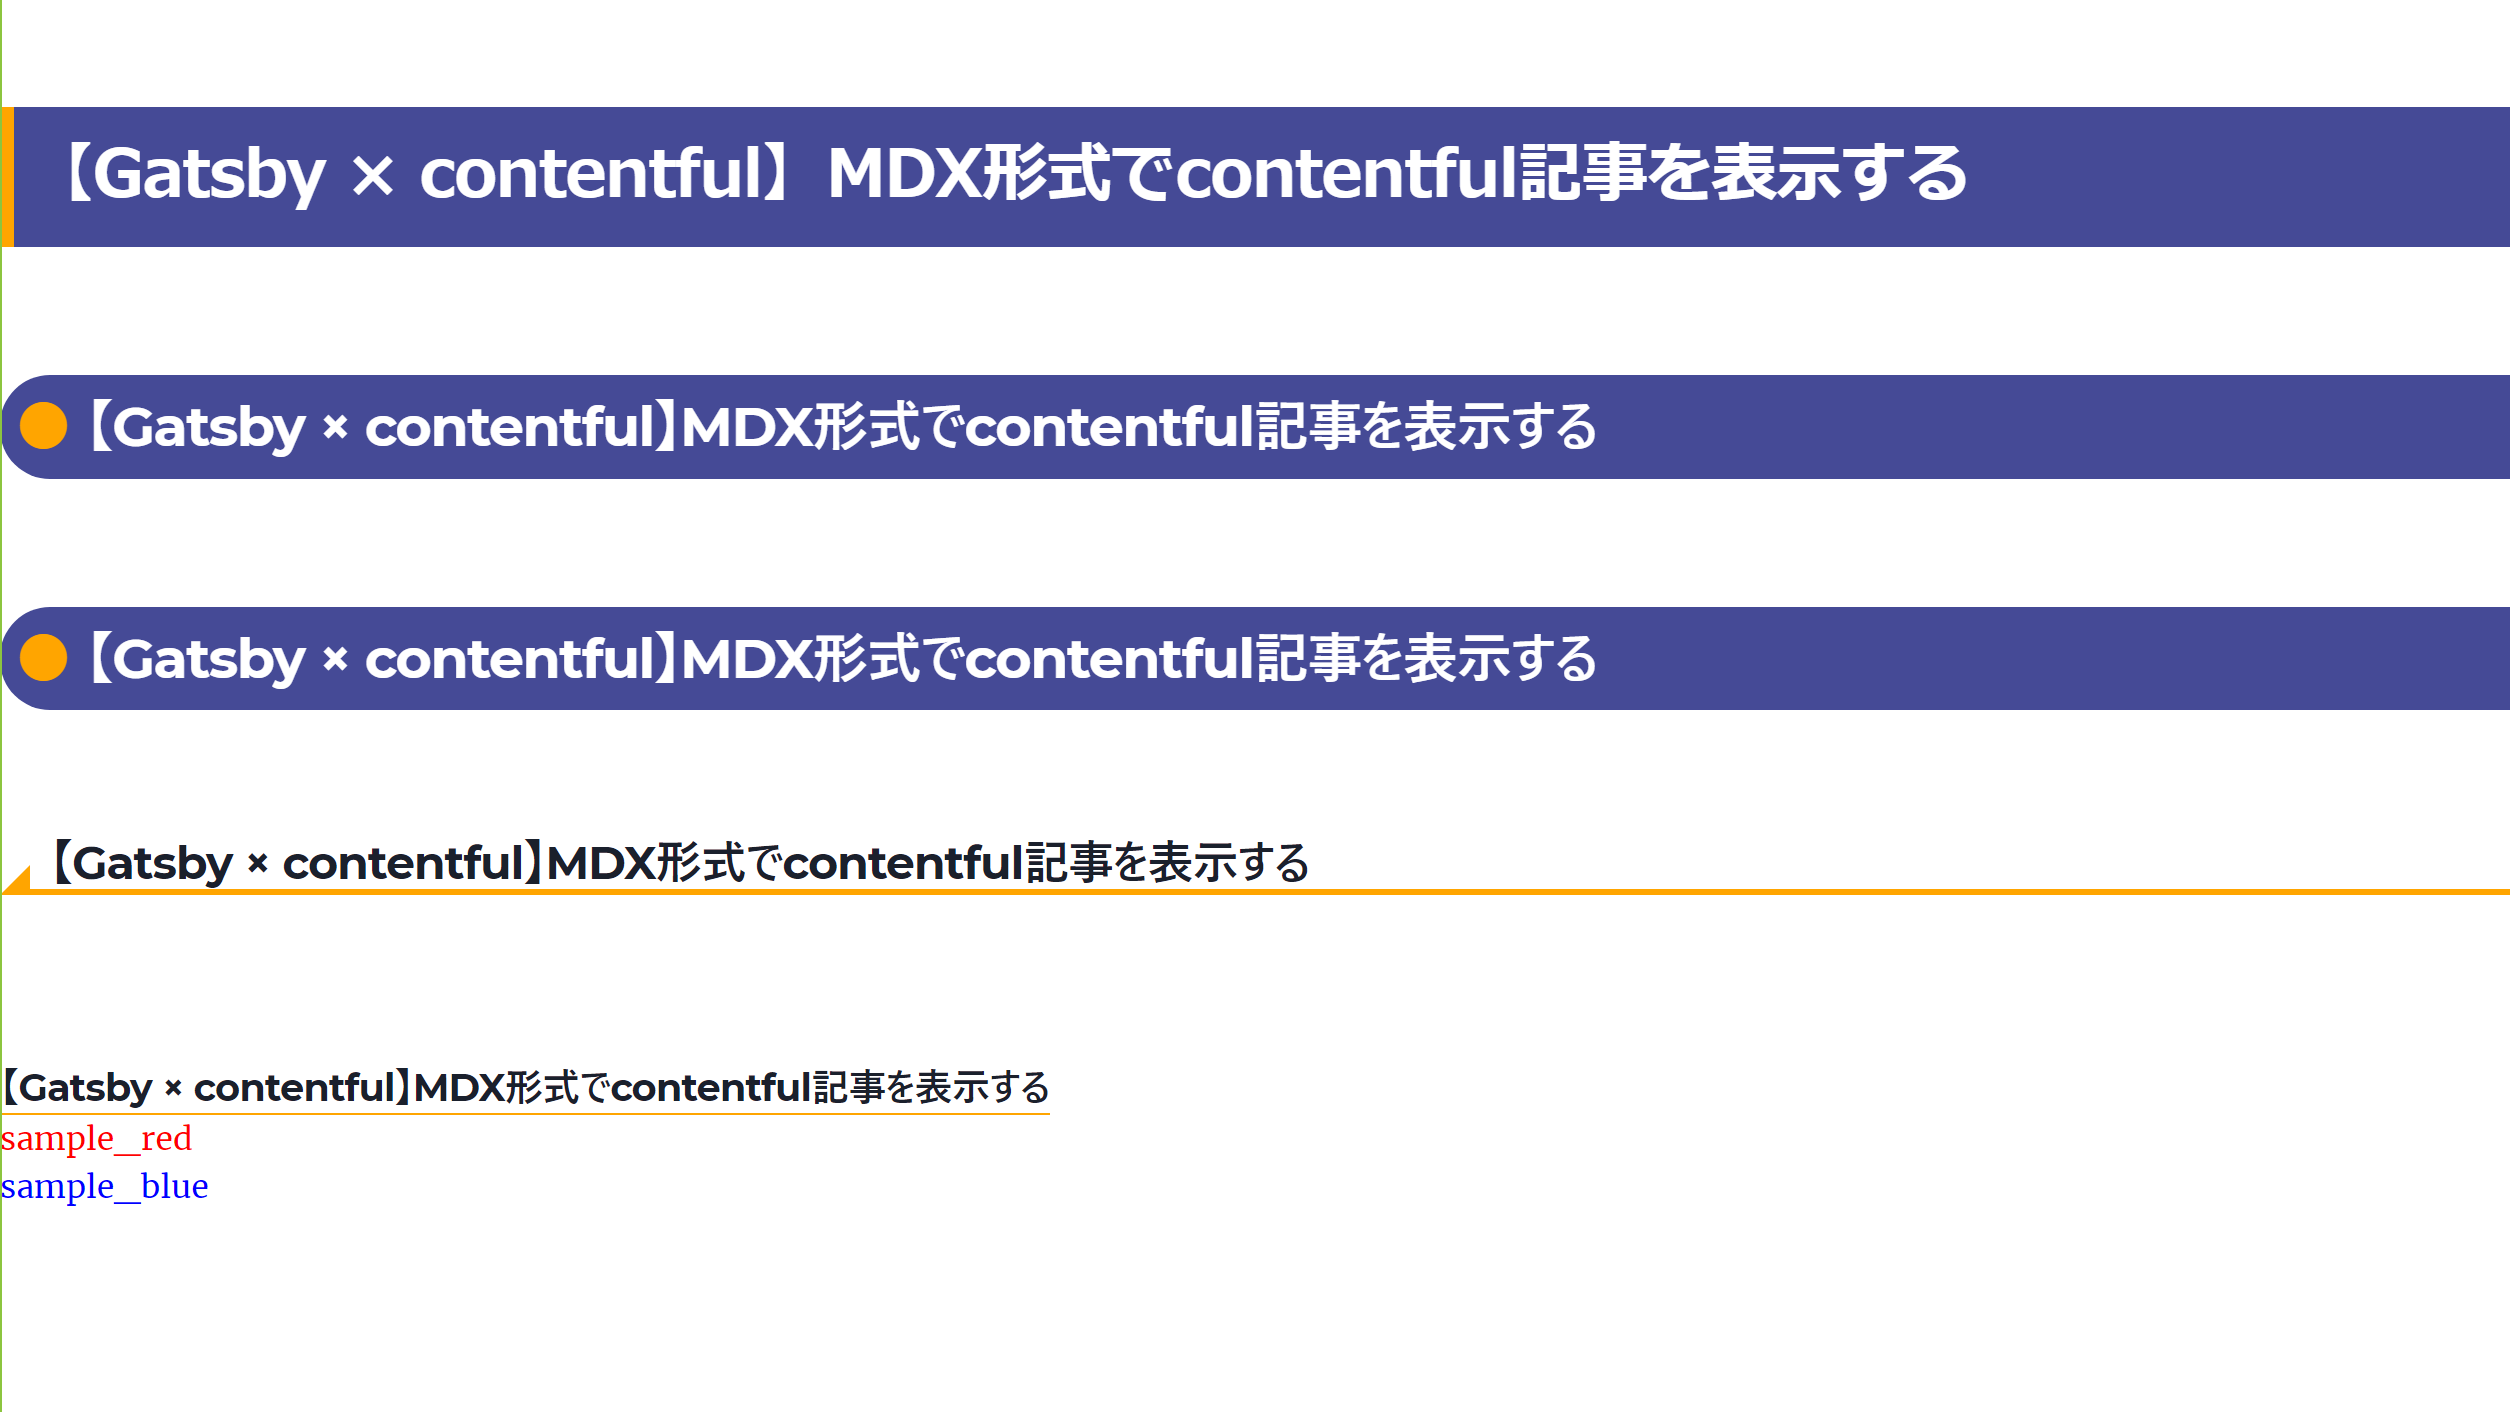
MDX内で書いたコンポーネントがhtmlに変換されて表示できている。
まとめ
contenful記事をMDX形式で扱うと記事の装飾などが簡単にでき、また
ソースコードの埋め込みやアドセンスを記事内に入れたい場合に使用できるので
かなり便利です。
埋め込みやアドセンスを記事内に入れる方法については別記事で書こうと思います。
またcontenful記事から目次を生成する方法については下記でまとめています!


参考書籍
Gatsbyの基本的な仕組みや環境設定方法など下記の書籍が参考になりました。
特に特典のセットアップPDFはversionが上がると更新してくれるようなので
Gatsbyのversionが上がった時なども今でも参考にしてます!

参考
下記を参考にさせていただきました
新着記事


top